Life is Amazing.Home, Travel, Hobbies, Fun
|
|
12/5/2017 0 Comments DIY "Classy" Christmas Card HolderBy Monica Christmas is just around the corner and the cards are starting to arrive. Now you need a beautiful (yet, inexpensive) way to display them! Lucky for you, I know just the thing...  A few years ago, I was looking for a creative and elegant way to display all my cards from friends and family. I found some beautiful display frames in some high-end furniture stores but they were asking almost $250 for a silly frame! I looked it over carefully and decided I could make one myself for a lot cheaper, and even better… I could make it exactly the way I wanted it to look. Since then, I have made another dozen as gifts for many of my friends and family have begged for one! With encouragement from my sisters, I decided to share my step by step process. Below, you will find a list of supplies, tools needed, and step by step instructions. If I can do it, so can you!! Supplies:
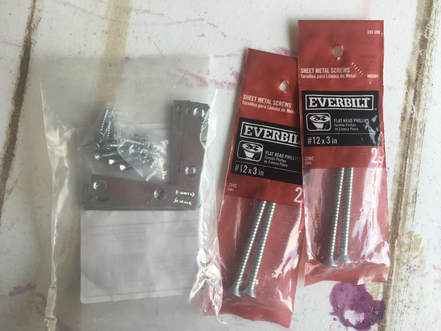
Tools:
Let's Get Started! 1. Decide where you want to hang or place your Christmas card holder. Since you are making it custom you can make it fit any space you want. (I made mine 28” x 42” and I think it is perfect) 2. Using your Mitre Box, cut your corners at 45 degree angles. 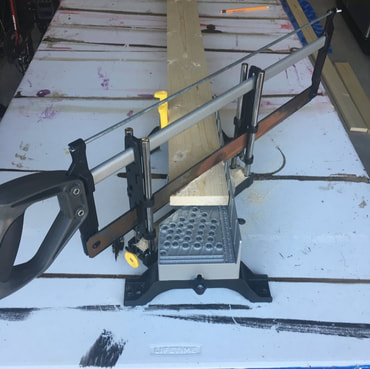 3. Using your sandpaper, sand off any splintered edges or bumps so the corners line up perfectly. 4. Now this is the fun part…..Place all 4 pieces of wood on an old blanket or beach towel and hammer away. This gives your frame a rustic old world look. (If you are going for a clean line look, skip this step) 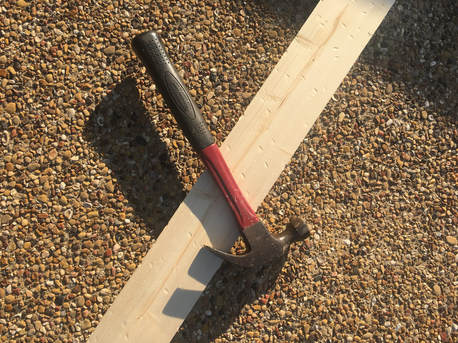 5. Lay out your wood to make the frame. On the back of the frame attach your L brackets. 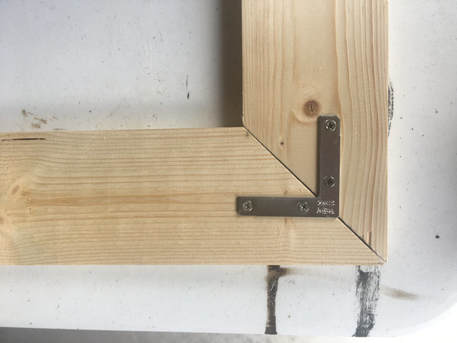 6. I felt as if this was not sturdy enough, so I decided to sink 4 large screws in each corner of the frame to add extra support.
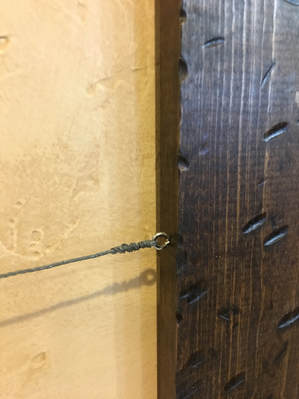
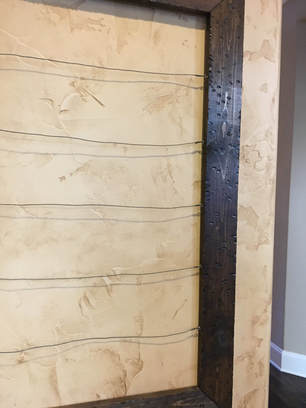
 7. Stain or paint your wood any color you want. (I have been using a dark stain, but I cant wait to make a rustic white one.) 8. Allow plenty of time for stain to dry. 9. Install the picture wire and small screw eye rings. (see picture) I spaced mine every 5 inches.
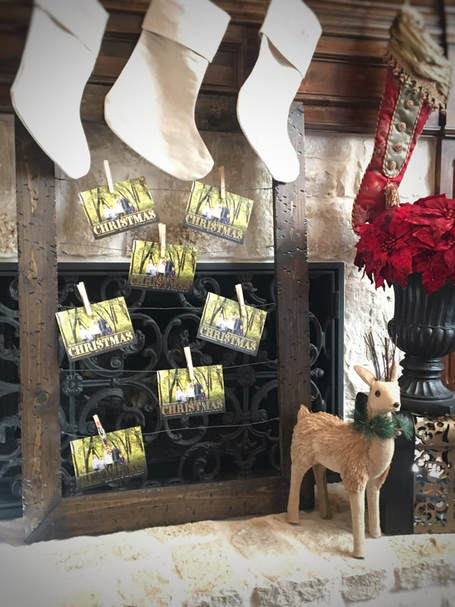
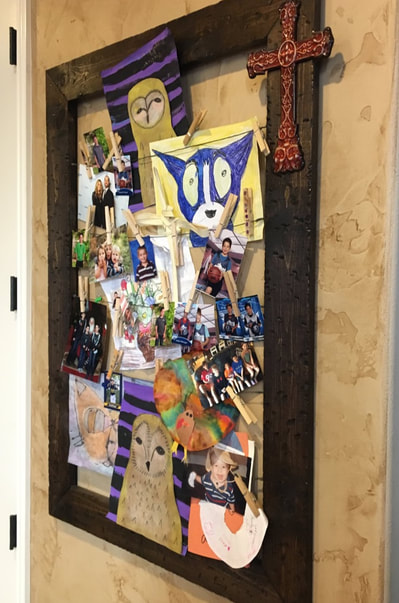
Congrats! You are finished! You can lean the frame against any mantel or wall or hang it anywhere. I have mine hanging in the kitchen. During Christmas it displays my Christmas cards. During the other months of the year, it displays my kids’ special artwork, pictures, or birthday cards. It would make an excellent gift for a college student too. Enjoy and feel free to share with your friends!!
0 Comments
|
 RSS Feed